Disclosure: This recipe is proudly sponsored by Panasonic Singapore.
STORY BEHIND THE RECIPE
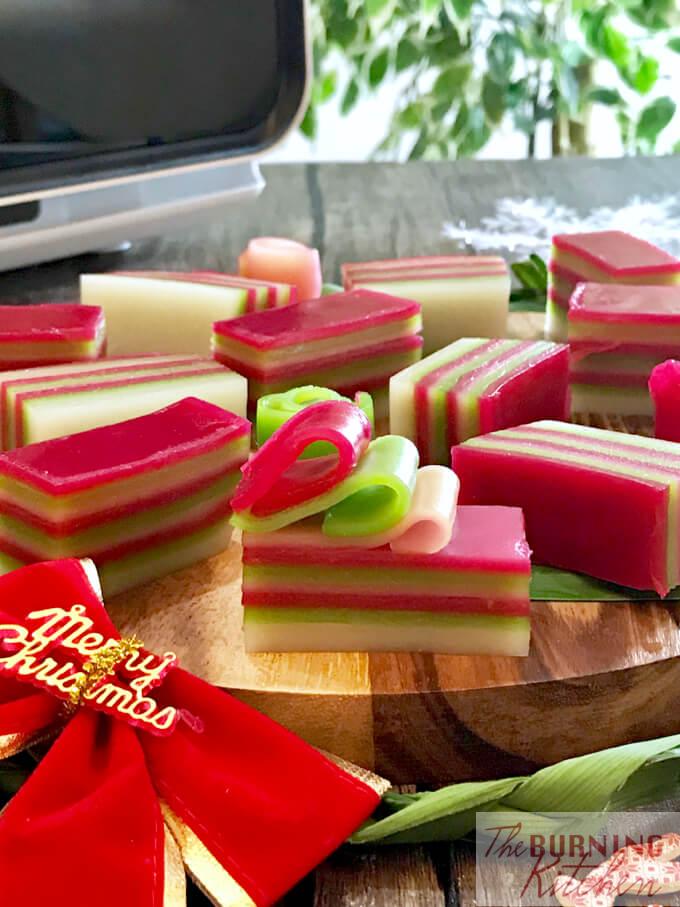
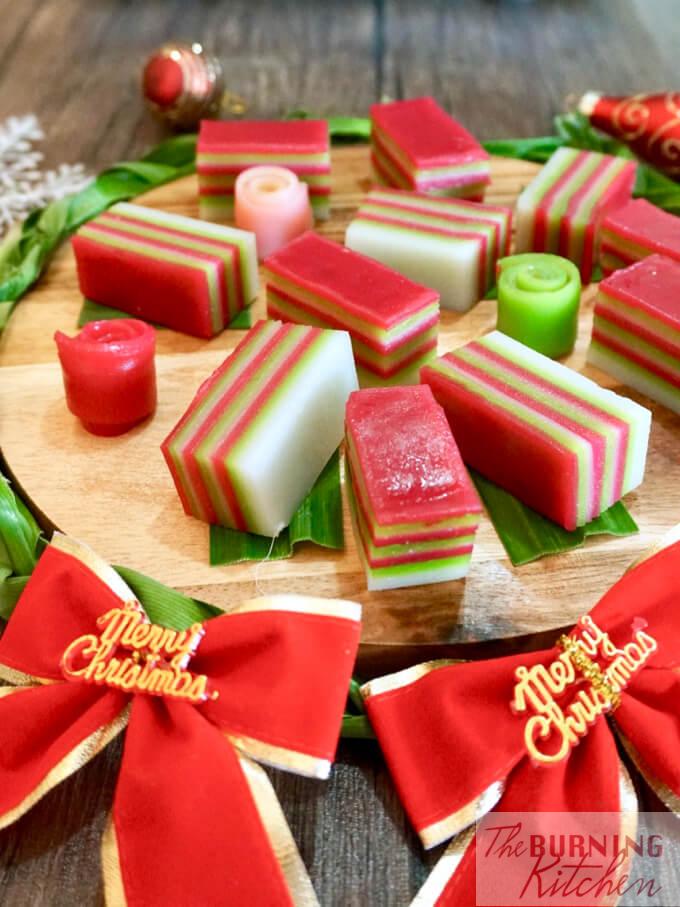
Steamed Kueh Lapis or 九层糕 (Jiu Ceng Gao) in Mandarin, is a vibrantly coloured kueh with 9 layers. The most common colour schemes are red, green and white, or rainbow colours (blue, green purple, white and red).
It’s also a dish that my 4-year old loves to make as much as he loves to eat. His favourite part of making kueh lapis is watching me steam the layers individually, while he keeps time using the countdown timer on my phone!
Although Kueh Lapis is not difficult to make, it is pretty time consuming as each layer needs to be steamed individually. The steaming alone can takes almost an hour to complete!
I like to make this along with Bai Tang Gao (Pak Tong Go), another favourite family snack which uses similar ingredients.
PANASONIC CUBIE OVEN REVIEW
So when I was invited by Panasonic to try out their Cubie Convection Steam Oven, the first dish that came to mind was Steamed Kueh Lapis. I am really curious to put the Cubie Oven to the test to see if it will make the steaming process less onerous!
GRAB OUR HERITAGE HAWKER DELIGHTS COOKBOOK + EBOOK BUNDLED DEAL FOR JUST $44.85 (U.P. $54.80)
This Steamed Kueh Lapis recipe has been written with the Cubie Steam Oven in mind. But don’t worry if you don’t own a steam oven, you can still easily make this at home with some modifications. Please refer to the recipe notes section for the modifications if you are using the conventional steaming method.
Thank you Panasonic for providing us with this lovely convection steam oven!
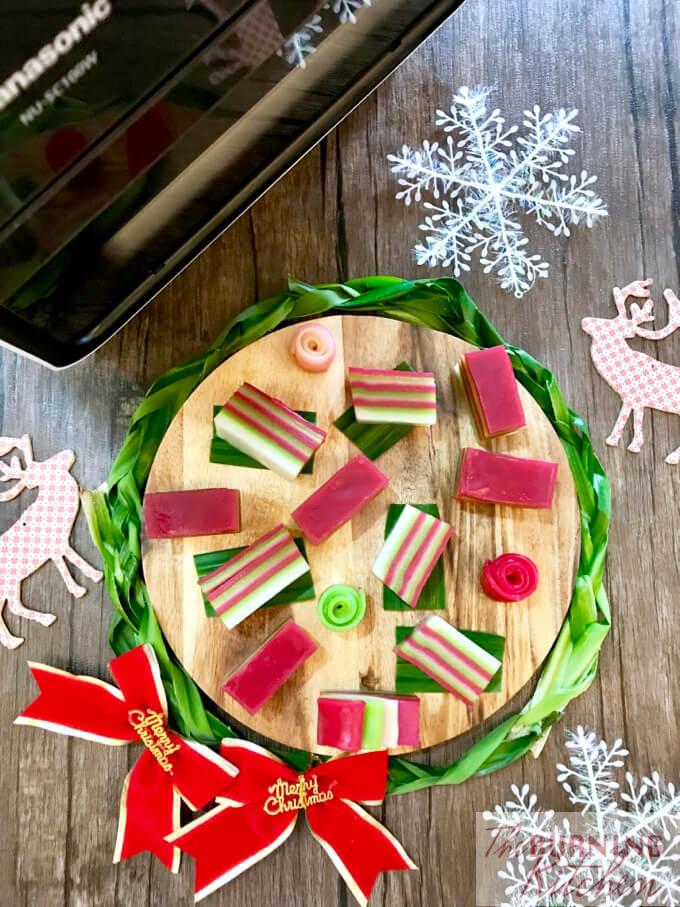
Since this is my first time using a steam oven, it took me 2 tries before I was satisfied with the softness and consistency of the kueh lapis. I even did a ‘controlled experiment’ whereby I cooked the same Kueh Lapis batter side by side using the Cubie oven and the conventional steaming method. The results turned out pretty comparable so I was very happy with that! And yes, my fridge is full of Kueh Lapis right now, if anyone’s interested 🙂
I thought I would compile my thoughts on the Cubie Steam Oven so far:
The Verdict
Pros:
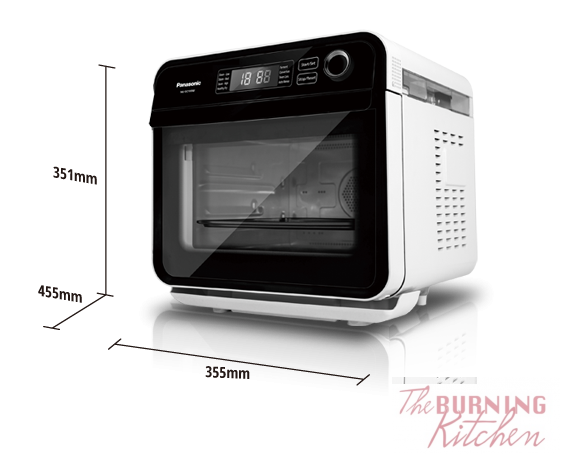
- Very compact, sleek and minimalist, and takes up slightly less countertop space than a microwave because of its cube shape

- Hassle free steam function, which I LOVE(!) because I find it a hassle to boil water and set up the steaming equipment just to reheat 3 pieces of kueh lapis for tea time. Moreover, it frees up the wok and burner so we can cook other dishes concurrently. All you need to do is fill the water tank, which will last you 30 minutes. I like that tank is made of clear plastic so I could easily check the water level without disrupting the steaming process.
- Steams food faster than usual because the steam is more concentrated. So yes, the oven did achieve my goal of making this dish less time consuming, shaving off a precious 15 minutes of cooking time from 1 hour to 45 minutes (25% improvement, not too bad!).
- Inbuilt timer! 🙂 In case my little time-keeper assistant decides to potter off.
- Water heats up really quickly, you only need to set the oven to steam mode for 3 minutes to heat it up.
- Very little condensation. I was amazed that there were only a few droplets (sorry the photo is not very clear but its on the right of the photo) by the time I completed the 8th layer. I gave it a quick wipe before placing the 9th layer in for the final 10 minutes. In contrast, I would have had to wipe the condensation from the wok lid each time I open the lid.

Cons:
- No ‘low-water’ warning I wish the oven had a warning beep or flashing indicator to let you know if you are running low on water. I only realised I was out of water when I noticed that amount of steam had suddenly reduced.
- Tinted window is a tad dark, making it a little hard to see if the layers of the Kueh Lapis were cooked without actually opening the oven to check.
- Compact size is a plus for smaller family meals and space-constrained kitchens, but does limit options if you have a larger meal to prepare. I’ll still need my large oven to do weekend roasts and larger baking batches. But I would definitely use the Cubie oven for steaming dishes though because its SO convenient!
Untested so Far:
- Multi-function and Autocook modes including Healthy Fry, Ferment, Convection and Steam Convection
- Cool self-cleaning functions to remove oil and odours. I haven’t had the chance to try yet since the oven was very clean after steaming.
Note: So far my experience of the product is only limited to testing out the steam function of the oven, which is the function that first attracted me to this oven! When time permits, I will try out the other functions and update this as I go along.
The Cubie Oven retails for $399 and is available at all major departmental stores. You can check out the full product specs here.
TRICK OF THE TRADE
Hunt for the ‘Perfect’ Kueh Lapis Recipe (Does it even exist?)
My son and I have been searching for the softest Kueh Lapis recipe. We experimented with many recipes online, until I realised that most recipes make the stringy version of Kueh Lapis, whereas I prefer a softer texture (so my young kids won’t choke on it!).
The perfect recipe actually depends on your personal tastes and preferences. I like the texture of the Kueh Lapis sold at Bengawan Solo, but the layers are too thin and too soft to pull apart without breaking.

So I decided to experiment with the proportion of tapioca starch (more springy texture) and rice flour (softer texture). I also experimented on the proportion of liquid (water and coconut milk) to flour to get my own perfect blend!
See the tips below so you can also modify the proportions to get to your perfect recipe! Recipe proportions were adapted from Anncoo Journal and Poor Skinny Chef.
WHAT I LIKE ABOUT THIS DISH
- It’s a kid-friendly dish! Most children (like my son) loves eating this, and making this too!
- It’s a great dish to share with friends and family. Since you’ll always make a big batch of Kueh Lapis, there’s always enough to share with others, or to store and eat later.
HOW TO MAKE KUEH LAPIS?
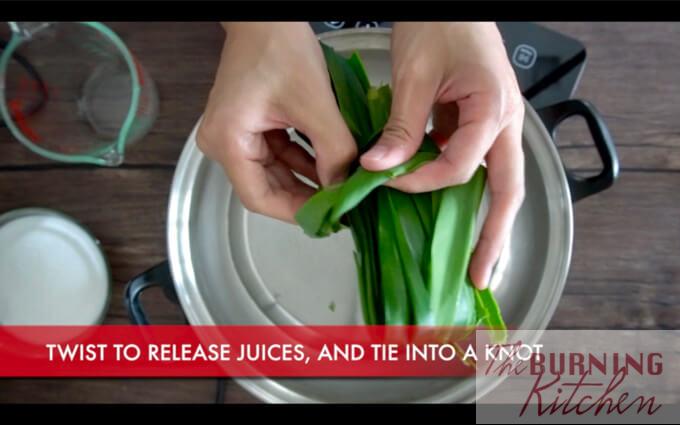
Wash the pandan leaves and drain dry. Then twist the leaves to break up the veins, and tie the pandan leaves into a bundle.
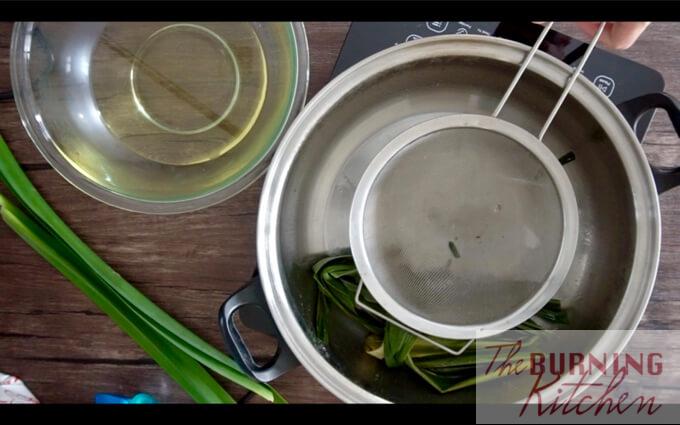
Add water, sugar, pandan leaves and salt to a pot and bring to a boil. Simmer for 5 mins until the sugar has dissolved and the syrup smells aromatic.
Transfer the syrup into a large heat-proof bowl through a sieve, then add the chilled coconut milk into the sugar syrup to help cool it down.
Add tapioca flour and rice flour into a seperate bowl and mix well.
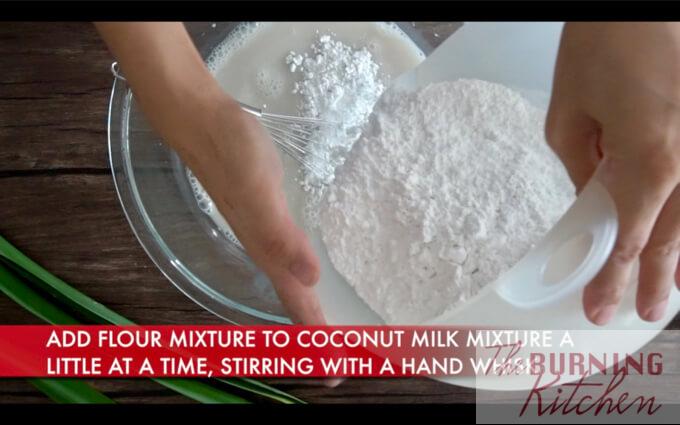
Once the sugar syrup is cool, add the flour mixture into the syrup mixture a little at a time, and stir with a hand whisk.
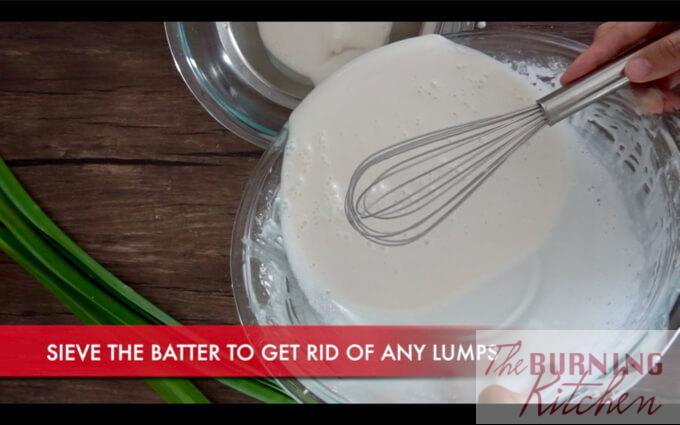
Sieve the batter to remove any lumps, then divide the batter into 3 equal portions. Add red and green food colouring to two of the portions, leaving the last portion white.
Grease the bottom and sides of the non-stick square tin with oil.
Fill the Panasonic Cubie Steam Oven water tank with water. Then place the square tin on the lower rack of the Panasonic Cubie Steam oven, and set the oven to ‘Steam-High’ for 3 minutes.
Stir the white batter, then use a ladle to pour in enough white batter to completely cover the bottom of the square tin. Then set the oven to ‘Steam-High’ for 4 minutes.
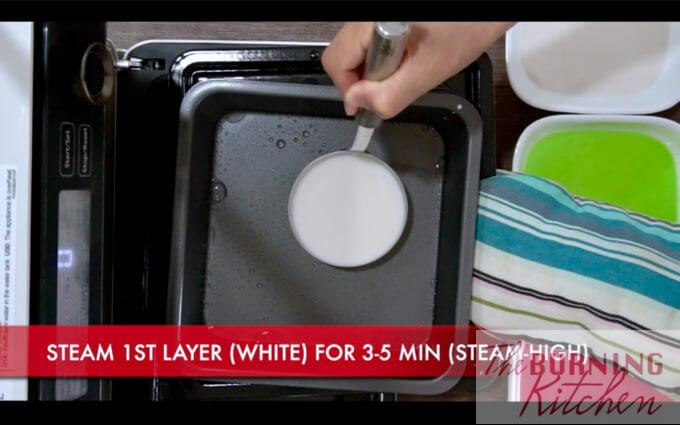
Check that the first layer of batter is completely set, then pour in just enough green batter to cover the first white layer, and set the oven to ‘Steam-High’ for 3 minutes. Repeat this process until you have 9 layers of alternating white, green and red layers.
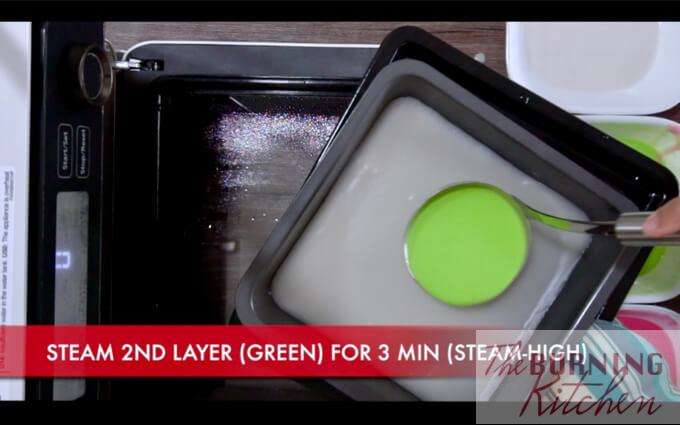
For the final layer (red), set the oven to ‘Steam-High’ for 10-12 minutes (instead of 3 minutes) to allow the whole Kueh to set.
Remove the Kueh Lapis from heat and allow to completely cool down (4-6 hours).
Use a greased silicone spatula to loosen the sides of the Kueh Lapis from the square tin tray, then invert the tray over a piece of baking paper.
Flip the kueh over so the red colour is on top. Then use a sharp greased knife to slice the Kueh Lapis into 32 (8×4) or 24 (6×4) pieces.
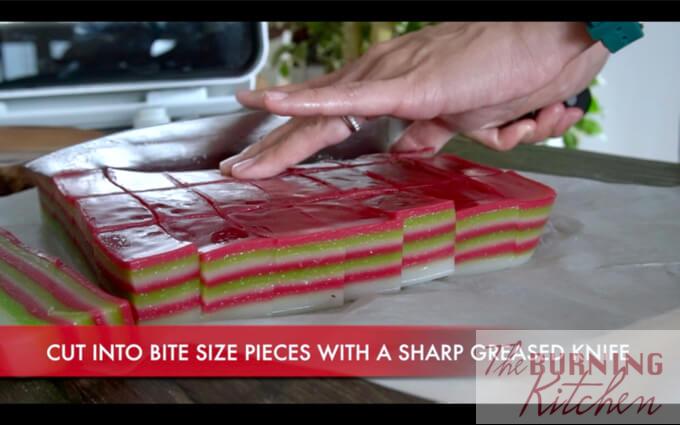
Garnish the sliced Kueh Lapis with some cut pandan leaves and serve

WHAT COCONUT MILK TO BUY?
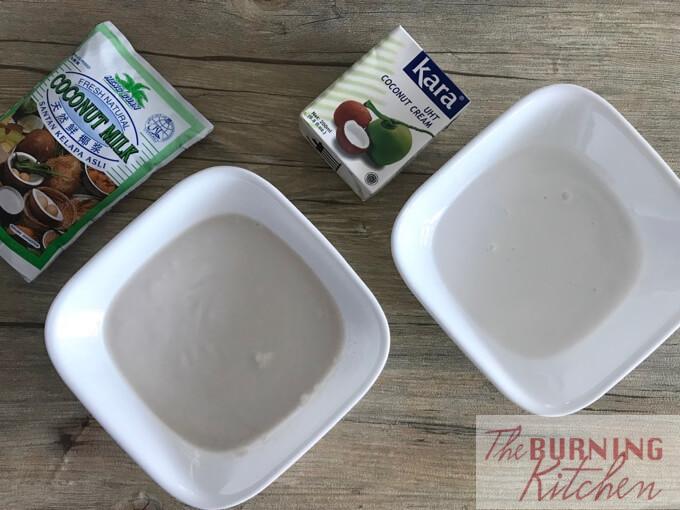
- Use either Kara Brand UHT Coconut Cream (baking section) or Heng Guan Fresh Coconut Milk (chilled section). Although Heng Guan brand says Coconut Milk, it is actually santan (coconut cream).
- Kara Brand is sweeter and whiter in colour, whereas the Heng Guan Brand is more aromatic but slightly greyish in colour, so it may affect the colour of your white batter. Kara Brand has the advantage of being UHT so it has a much longer shelf life, and we usually keep this in stock for ‘spur of the moment’ cooking.

EQUIPMENT TIPS
- Some trays have grooves at the bottom, so you may need to add more batter for the first white layer in order to completely cover the bottom of the tray. Hence the steaming time for the first layer also needs to be slightly longer.
- If your square tin slopes upwards, take the measurements based on the inside of the base of the tin to determine if yours is a 7″x7″ tin. For upward sloping tins, be sure to leave give some allowance as the top few layers will need slightly more batter to completely cover the previous layer.
PREP TIPS
- Break up the veins of the pandan leaves to draw out the aromatic fragrance more easily.
- You can cut the pandan leaves into small pieces instead. However we prefer to tie the leaves together so they can be easily removed.
- Add a little salt to the coconut milk to make the Kueh less ‘jelak’ ie a feeling of bloatedness and fullness.
- Always stir the batter before pouring in each layer to ensure a uniform consistency.
- Don’t feel compelled to use up exactly one third of the batter each time. This recipe provides for slightly more batter than is required (because there’s nothing worse than not having enough batter to complete 9 layers). Instead, use just enough batter to completely cover the previous layer.
- Always check that the previous layer has completely set before adding the next layer.
CUBIE OVEN STEAMING TIPS
- Use a towel to wipe the top inner surface of the oven just before steaming 7th or 8th layer to prevent condensation from dripping into the kueh.
- Also be sure to top up the water tank if the water level is running low.
- Ensure that the Kueh Lapis is completely cool before attempting to remove it from the tray, otherwise it may stick to the pan and be very difficult to cut.
- Place the steamed batter in an ice bath to speed up the cooling process if you simply can’t wait 6 hours for the Kueh Lapis to cool!
CONVENTIONAL STEAMING METHOD
- If you are using the conventional steaming method in a wok over the stove:
- Fill the wok with sufficient water (water level should reach the top of the steaming rack) and bring to a boil
- Once boiling place the greased tray on the steam rack, ensuring it is level otherwise the Kueh Lapis will tilted to one side, and heat for 3 minutes
- Steam the 1st layer for 5 minutes, and 2nd to 8th layer for 4 minutes, and the last layer for 15 minutes.
- Wipe off any condensation from the wok / pot cover before steaming the next layer, to avoid water from dripping into the kueh and ruining it.
- Check the water level and keep a kettle of boiling water close by to top up the water in the wok as needed.
STORING AND ADJUSTMENTS
- Wrap any leftover Kueh Lapis in plastic to prevent them from sticking together, then store in the fridge. Ensure that you remove the plastic before steaming to re-heat the Kueh Lapis.
- Increase the tapioca starch by 50 / 100g and reduce the rice flour by the corresponding amount if you prefer a more springy / chewy texture. The flour mixture should still total up to 450g in all.
- Increase the amount of coconut cream by 100 – 200g and reduce the amount of water by the same amount if you prefer a stronger coconut flavour. The liquid mixture should still total up to 1200 ml.
PROPORTIONS
Tapioca Starch to Rice Flour Proportion
- 350g, 100g – Very springy, I prefer a softer texture
- 300g, 150g – Nice texture and easy to peel layers, would be nice if I can get it just a little softer
- 250g, 200g – Love the soft texture, and its still relatively easy for my 4 year old to peel off the layers intact. But the layers are more fragile and may break if handled too roughly. I liked this the best
Flour to liquids
- 450g, 1000ml (50% water 50% coconut cream) – Personally find this too dense and filling
- 450g, 1200ml (50% water 50% coconut cream) – Lighter and less ‘jelat’. If you like a richer coconut-y flavour you can try 65% coconut cream and 35% water, I’m pretty happy with the 50-50 combi.
DIETARY MODIFICATIONS
- Egg-Free: No modifications needed.
- Fish-Free: No modifications needed.
- Gluten-Free: No modifications needed.
- Nut-Free: No modifications needed.
- Shellfish-Free: No modifications needed.
- Vegan: No modifications needed.
- Vegetarian: No modifications needed
WATCH OUR VIDEO for how to make this recipe!
Tried this recipe? Please rate our recipe or leave us a comment! You can even upload a snap of your creation!
Don’t forget to subscribe to our Youtube channel for more yummy videos! Do also join us at TBK Home Cooks Facebook Group where you can post photos of your food, ask questions, share recipes and clean cooking tips from others in the group!
Kueh Lapis (Nine-Layer Cake / Jiu Ceng Gao)
Ingredients
- 600 ml Water
- 400 g Castor Sugar
- 8-10 Pandan Leaves
- 1/2 tsp Salt
- 250 g Tapioca Flour
- 200 g Rice Flour
- 600 ml Coconut Cream (Santan) Chilled
- 7" Non-stick Square Tin
- 1 tsp Oil To grease pan
- 4-6 Pandan Leaves (For garnishing)
Instructions
PREPARATION METHOD
- Wash the pandan leaves and drain dry. Then twist the leaves to break up the veins, and tie the pandan leaves into a bundle.
- Add water, sugar, pandan leaves and salt to a pot and bring to a boil. Simmer for 5 mins until the sugar has dissolved and the syrup smells aromatic.
- Transfer the syrup into a large heat-proof bowl through a sieve, then add the chilled coconut milk into the sugar syrup to help cool it down.
- Add tapioca flour and rice flour into a seperate bowl and mix well.
- Once the sugar syrup is cool, add the flour mixture into the syrup mixture a little at a time, and stir with a hand whisk.
- Sieve the batter to remove any lumps, then divide the batter into 3 equal portions. Add red and green food colouring to two of the portions, leaving the last portion white.
- Grease the bottom and sides of the non-stick square tin with oil.
COOKING METHOD(45 Min using Cubie Steam Oven, 1 hour using Conventional Steaming method in recipe notes)
- Fill the Panasonic Cubie Steam Oven water tank with water. Then place the square tin on the lower rack of the Panasonic Cubie Steam oven, and set the oven to 'Steam-High' for 3 minutes.
- Stir the white batter, then use a ladle to pour in enough white batter to completely cover the bottom of the square tin. Then set the oven to 'Steam-High' for 4 minutes.
- Check that the first layer of batter is completely set, then pour in just enough green batter to cover the first white layer, and set the oven to 'Steam-High' for 3 minutes. Repeat this process until you have 9 layers of alternating white, green and red layers.
- For the final layer (red), set the oven to 'Steam-High' for 10-12 minutes (instead of 3 minutes) to allow the whole Kueh to set.
- Remove the Kueh Lapis from heat and allow to completely cool down (4-6 hours).
- Use a greased silicone spatula to loosen the sides of the Kueh Lapis from the square tin tray, then invert the tray over a piece of baking paper.
- Flip the kueh over so the red colour is on top. Then use a sharp greased knife to slice the Kueh Lapis into 32 (8x4) or 24 (6x4) pieces.
- Garnish the sliced Kueh Lapis with some cut pandan leaves and serve.
Notes
WHAT COCONUT MILK TO BUY?
- Use either Kara Brand UHT Coconut Cream (baking section) or Heng Guan Fresh Coconut Milk (chilled section). Although Heng Guan brand says Coconut Milk, it is actually santan (coconut cream).
- Kara Brand is sweeter and whiter in colour, whereas the Heng Guan Brand is more aromatic but slightly greyish in colour, so it may affect the colour of your white batter. Kara Brand has the advantage of being UHT so it has a much longer shelf life, and we usually keep this in stock for 'spur of the moment' cooking.
EQUIPMENT TIPS
- Some trays have grooves at the bottom, so you may need to add more batter for the first white layer in order to completely cover the bottom of the tray. Hence the steaming time for the first layer also needs to be slightly longer.
- If your square tin slopes upwards, take the measurements based on the inside of the base of the tin to determine if yours is a 7"x7" tin. For upward sloping tins, be sure to leave give some allowance as the top few layers will need slightly more batter to completely cover the previous layer.
PREP TIPS
- Break up the veins of the pandan leaves to draw out the aromatic fragrance more easily.
- You can cut the pandan leaves into small pieces instead. However we prefer to tie the leaves together so they can be easily removed.
- Add a little salt to the coconut milk to make the Kueh less 'jelak' ie a feeling of bloatedness and fullness.
- Always stir the batter before pouring in each layer to ensure a uniform consistency.
- Don't feel compelled to use up exactly one third of the batter each time. This recipe provides for slightly more batter than is required (because there's nothing worse than not having enough batter to complete 9 layers). Instead, use just enough batter to completely cover the previous layer.
- Always check that the previous layer has completely set before adding the next layer.
CUBIE OVEN STEAMING TIPS
- Use a towel to wipe the top inner surface of the oven just before steaming 7th or 8th layer to prevent condensation from dripping into the kueh.
- Also be sure to top up the water tank if the water level is running low.
- Ensure that the Kueh Lapis is completely cool before attempting to remove it from the tray, otherwise it may stick to the pan and be very difficult to cut.
- Place the steamed batter in an ice bath to speed up the cooling process if you simply can't wait 6 hours for the Kueh Lapis to cool!
CONVENTIONAL STEAMING METHOD
- If you are using the conventional steaming method in a wok over the stove:
- Fill the wok with sufficient water (water level should reach the top of the steaming rack) and bring to a boil
- Once boiling place the greased tray on the steam rack, ensuring it is level otherwise the Kueh Lapis will tilted to one side, and heat for 3 minutes
- Steam the 1st layer for 5 minutes, and 2nd to 8th layer for 4 minutes, and the last layer for 15 minutes.
- Wipe off any condensation from the wok / pot cover before steaming the next layer, to avoid water from dripping into the kueh and ruining it.
- Check the water level and keep a kettle of boiling water close by to top up the water in the wok as needed.
STORING AND ADJUSTMENTS
- Wrap any leftover Kueh Lapis in plastic to prevent them from sticking together, then store in the fridge. Ensure that you remove the plastic before steaming to re-heat the Kueh Lapis.
- Increase the tapioca starch by 50 / 100g and reduce the rice flour by the corresponding amount if you prefer a more springy / chewy texture. The flour mixture should still total up to 450g in all.
- Increase the amount of coconut cream by 100 - 200g and reduce the amount of water by the same amount if you prefer a stronger coconut flavour. The liquid mixture should still total up to 1200 ml.
PROPORTIONS
Tapioca Starch to Rice Flour Proportion
- 350g, 100g - Very springy, I prefer a softer texture
- 300g, 150g - Nice texture and easy to peel layers, would be nice if I can get it just a little softer
- 250g, 200g - Love the soft texture, and its still relatively easy for my 4 year old to peel off the layers intact. But the layers are more fragile and may break if handled too roughly. I liked this the best
Flour to liquids
- 450g, 1000ml (50% water 50% coconut cream) - Personally find this too dense and filling
- 450g, 1200ml (50% water 50% coconut cream) - Lighter and less 'jelat'. If you like a richer coconut-y flavour you can try 65% coconut cream and 35% water, I'm pretty happy with the 50-50 combi.
Hi
Please submit ogura cake recipe using cubie oven.
I failed to do it with my cubie
Hi Febry, thanks for the suggestion! Right now we have a long pipeline of CNY recipes that we have given ourselves a target to publish before Chinese New Year! But we will definitely add this one to the list of possible recipe projects to do after Chinese New Year, as I’ve personally been wanted to try out the steam bake function of the Cubie oven 🙂
Yesss… thankyou.. can’t wait to read the post.
Thank you very much for the recipe. I tried it exactly as you had typed with the #3 tapioca/rice flour ratio and found it too soft for my liking. Also, too sweet.
I tried the #2 ratio of tapioca:rice flour with reduction of sugar to 350gm and got the perfect texture and sweetness.
Am attaching both pictures. The lighter one is 1st attempt, darker is 2nd attempt. Colouring using bunga telang and Roselle flower reduction.
Hi Janice, yes every recipes need modifications according to individual preference in terms of texture, taste and even color . The kueh look very good. Perhaps for the roselle color, you can use more flowers n less water to make it look more vibrant. On the whole , well done! Make me feel like eating them.
Do you mind can i ask which Kuih lapis flour ration you are using. There are three on the list. Did you try the first one 350g Tapioca flour against 100 rice flour. Does that turn out springy and chewy like Bangawan solo’s type. I have attempted the other two recipes not the first one.. Can i ask?
Hi Adelene, I believe Janice tried 2 versions. First time, she used the #3 ratio (which is the one we ended up using in the blog post recipe), but she found it too soft. Second time, she tried the #2 ratio, with reduction in sugar to 350gm, and this is the one she really liked. Its really up to individual taste and preference :
Do you have a ted soft on your kueh lapis recipe. Yours i have attempted not bad but i prefer a ted soft
Hi Adelene, I have tried several variations of the kueh by using different ratios of flour and coconut milk. The version on the recipe is the #3 ratio (250g Tapioca Starch, 200g Rice Flour) is the softest that I managed to get, while still being able to pull apart the individual layers (this is a pre-requisite for my 4 year old boy!! haha ) The rule is the more rice flour, the softer the kueh. In fact, my mum tells me that in the old days, they didn’t use tapioca starch at all, only rice flour. This gives the kueh… Read more »
Can i please ask for the springy recipe, 350g against 100 rice flour. Is that texture turns out as Bangawan solo, like of like with Sago flour texture, chewy and springy and not hard. I have tired your other two recipes. Thanks for your recipes
Hi Adelene, thanks so much for your support! May I know which are the other 2 recipes that you have tried? Any feedback / rating for us?? I find Bengawan solo kueh lapis is on the softer side (which I prefer), compared to other commercial versions. So I think the most similar to Bengawan Solo texture would actually be the softer version ie 250g Tapioca Starch, 200g Rice Flour. The springy recipe 350g tapioca vs 100g rice was the first one I tried, but my guinea pigs, including my mum found it slightly tough and chewy. Hence I ended up… Read more »
There are 2 kinds of rice flour: regular and glutinous. Which one is being used in this recipe? Thanks
Hi Michelle! The correct flour to use should be rice flour, it is 250g tapioca flour mixed with 200g rice flour. Hope you manage to recreate it and post a photo on our facebook page 🙂 Happy cooking!
I tried the 250/200 portion. Loved it! Just the right texture. Reduced the sugar to 350gm but still tasted too sweet for me. Will reduce to 320gm next time. I used the stove top steaming, in the conventional wok. Didnt have the right cake tin. Used a bread tin instead, which makes 3 kuih lapis. Means 3x the effort. Will reduce the ingredients accordingly next time. Since im using the bread tin.
Totally yums!!!! Tq for sharing! 🌈🌈
Hi ZJamali, thank you for your kind comment! It makes us so happy when we see people enjoying our recipe. Remember to take a picture of the beautiful final product and share it on our Facebook page 🙂 Happy cooking!
Hi Melissa,
I tried making it today and it is really great! I used the 300g/150g ratio, sugar 350g and my husband love it! Great recipe!
I wanted to ask about storage. Is it ok to leave it at room temperature overnight and how long before we need to transfer the storage to refrigeration?
If reheat the cold refrigerated kueh, how long to steam it for?
Thanks in advance. 🙂
Recipe is perfect. Won’t change a single thing.
Stella, so glad to hear your success story. Appreciate if you could post a picture of your finished product in our FB page to like, share and comment. Thank you.
How can you store it? Can I freeze it?
Hi Yuki, it is not recommended that you should keep the kueh lapis for too long aa it is make of coconut milk. At most you can keep in the fridge for 2-3 days.in a air tight container. It will harden a little so you need to steam it again for about 5 -7 mins and let it. cools down before consuming it. Hope that helps.
hello i wanted to try this out for a school event but i don’t have the time to allow it to cool. i’d like to ask what would happen if i completely skip this step
Hi ry, I am afraid the kueh has to be cooled first before removing it from the tray. It’s impossible to cut it into pieces because it’s too soft and sticky. May I suggest that you make it a day before the event. The kueh can be kept for a day without refridgeration. However, it can be kept in the fridge for up to one week. If it’s harden, don’t worry. Steam
the kueh and it will become soft again. Hope this helps to solve your problem.